How to Bake the Perfect Cinnamon Roll - No. 263
Wordloaf’s Andrew Janjigian tweaks my mother’s sweet roll recipe just in time for Christmas
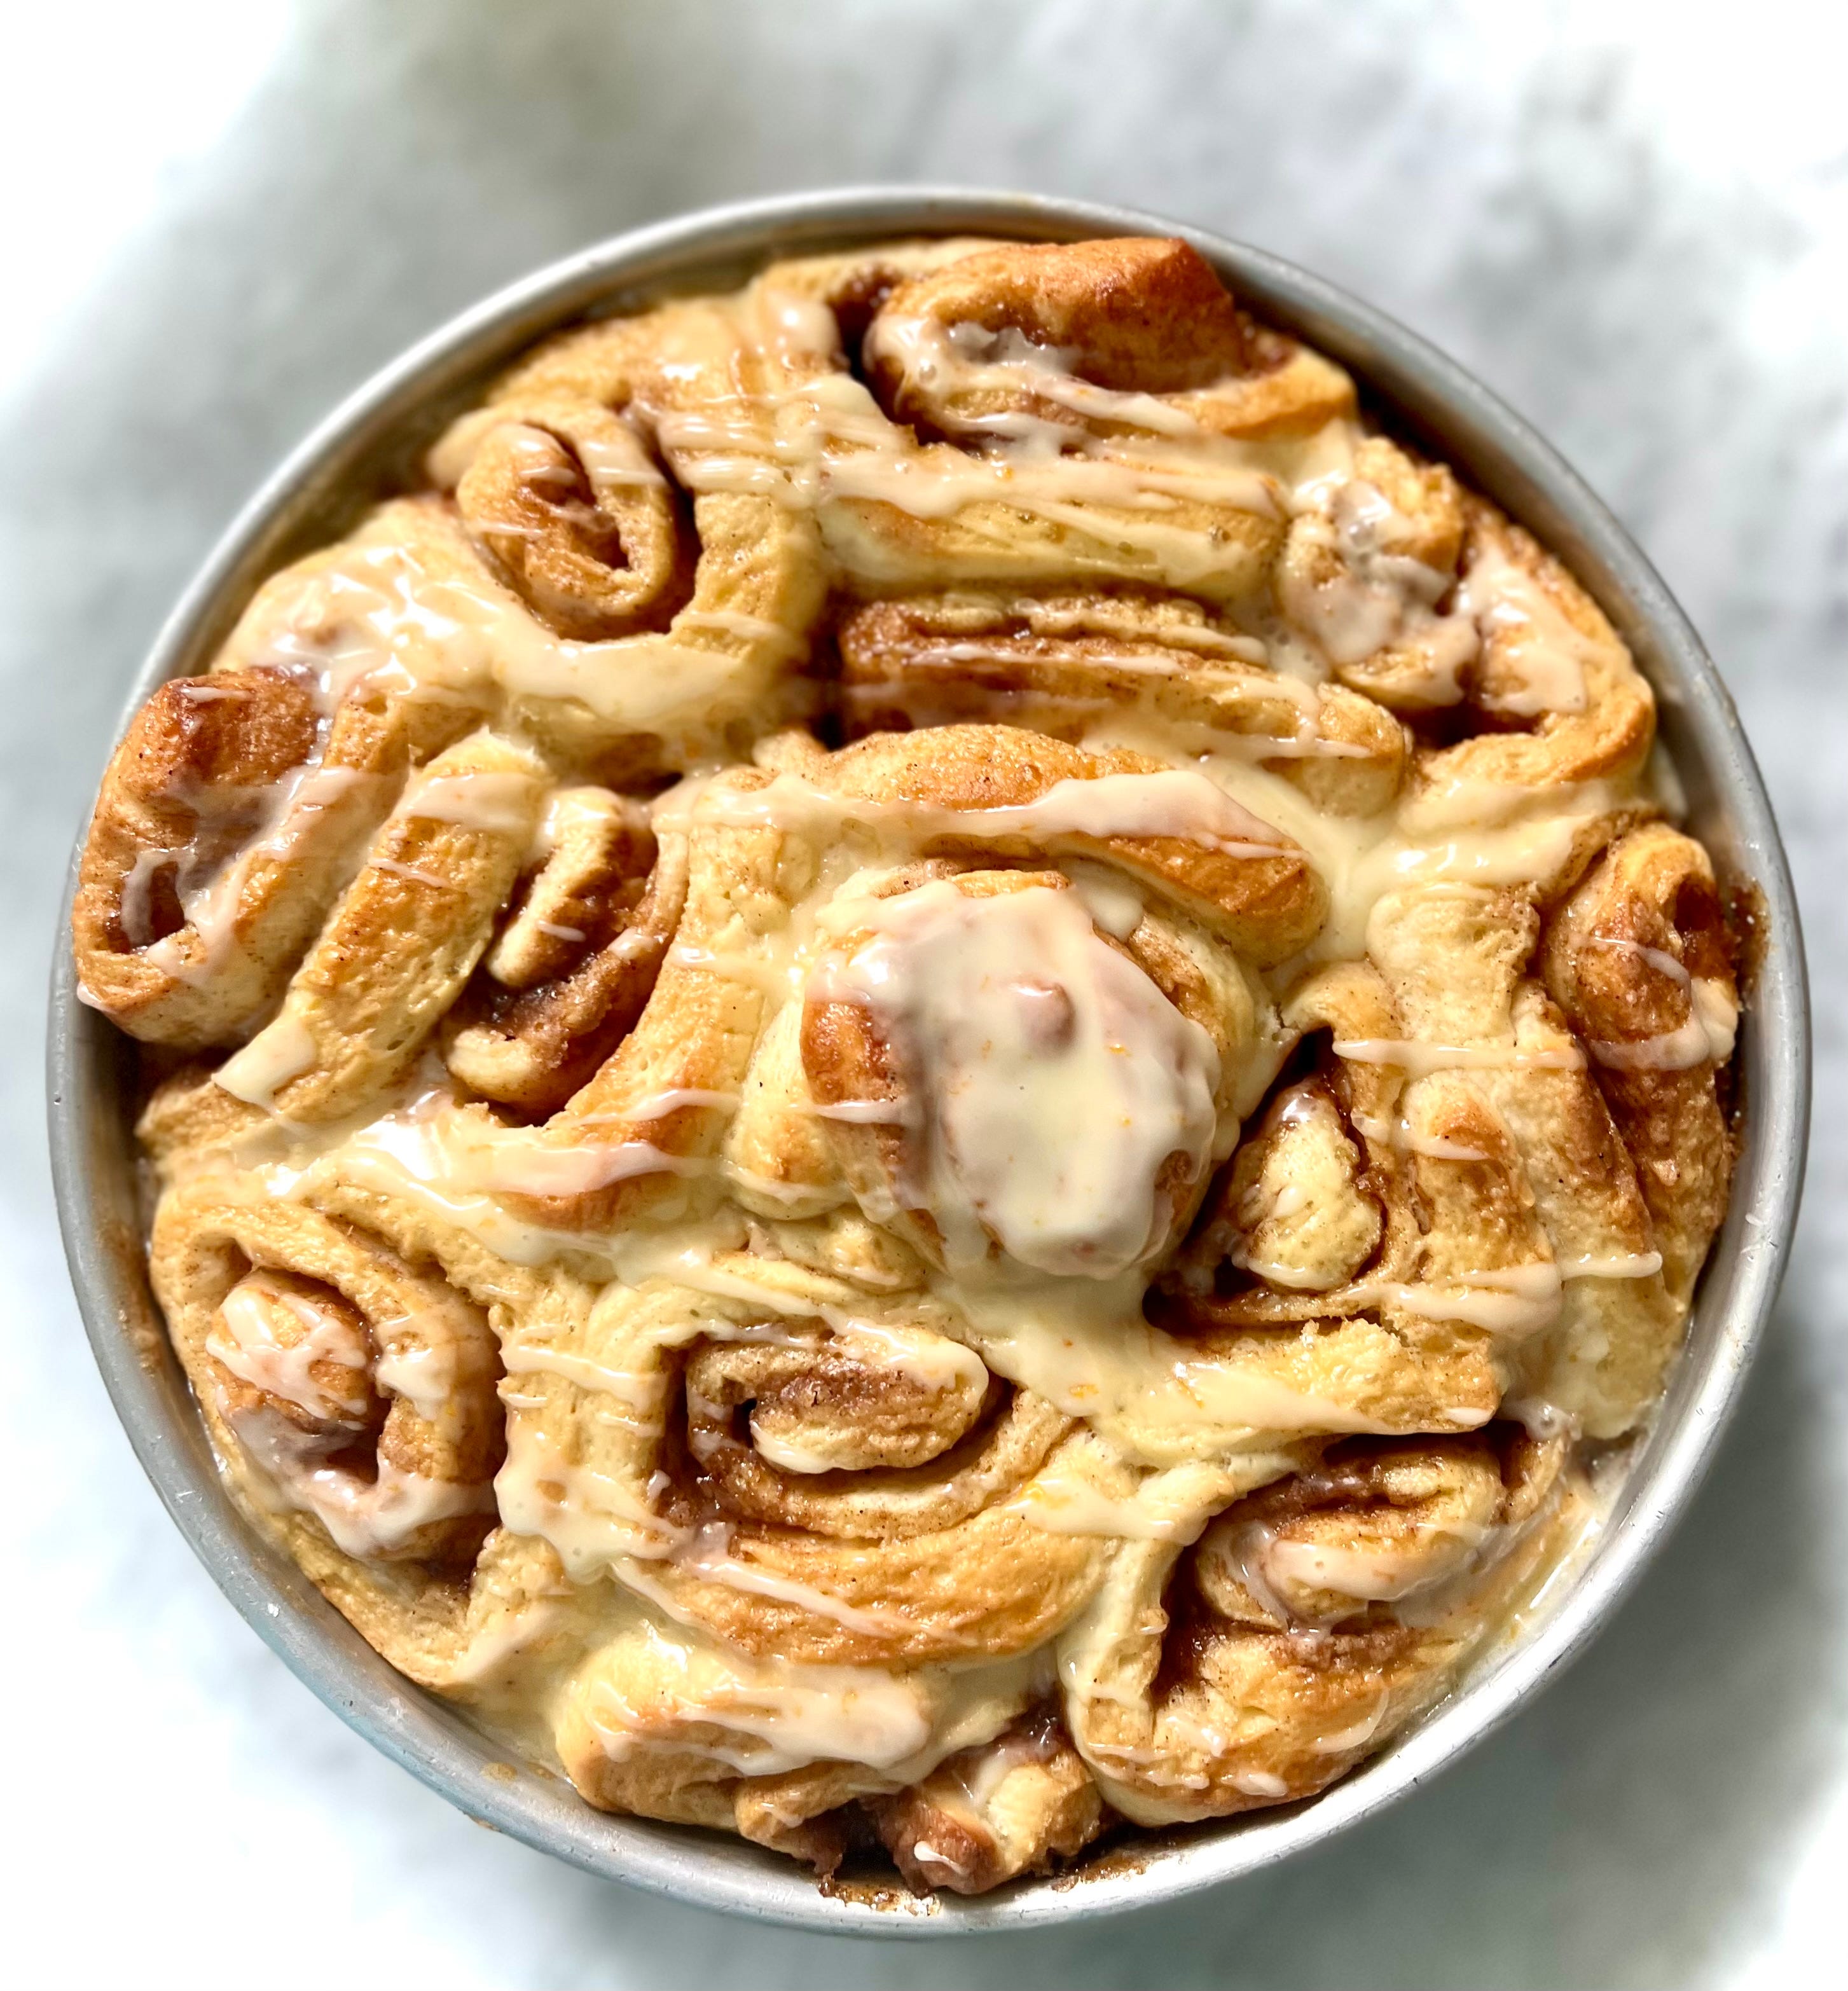
Today, I am thrilled to partner with Wordloaf’s Andrew Janjigian for this post on cinnamon rolls. While I tend to be pretty relaxed when it comes to baking, Andrew, a chemist, is dedicated to all the details.
To read his take on improving my mom’s cinnamon roll recipe, visit Wordloaf. Andrew lives and bakes in Cambridge, Massachusetts, is a former long-time test cook at Cook's Illustrated magazine, has been teaching baking and pizza classes for more than 10 years, and before working at Cook's Illustrated, he was an organic chemist in the biotech industry.
Part One: The origin story
For the past few months I’ve been taking an online writing course challenging me to reach back into my life for moments and stories worth telling other people about. As has been scientifically proven, memory and our sense of smell are connected, so my memories largely have to do with the scents emanating from my mother’s kitchen. The most vivid was her cinnamon rolls. The aroma seemed to drift up the stairs and into my bedroom. As if under a spell, I race to the kitchen and reach for a roll.
My mother immediately swats away my hand.
‘’Hot dough gives you a stomach ache,’’ she warns.
‘’It’s never given me a stomach ache!’’ I cry.
‘’Hot sugar will burn your mouth, Anne,’’ stretching out my name like a soft ball of dough. ‘’You better let them cool a bit.’’
But I don’t listen.
I tear the roll into pieces and chew each one with my mouth open to let the steam escape, then lick the hot, sticky brown sugar filling off my fingers. There was nothing better.
Cinnamon rolls, or sweet rolls as we call them in the South, have always been a resourceful way for home cooks to use up scraps of roll and biscuit dough. They have roots in the Pennsylvania Dutch kitchens with those molasses-filled sticky buns, and they are beloved down in Alabama when glazed with orange, but I’ll bet they are at home most anywhere.
My mother baked cinnamon rolls each Christmas. One year she got fancy and instead of cutting the roll into slices, twisted the rope of dough and connected it at the ends to make a wreath. After baking, she glazed it with powdered sugar icing and dotted it with red and green candied cherries. It was so very 1970s, but so very good.
I pulled out my mom’s recipe over the Thanksgiving holidays and baked some cinnamon rolls in advance of our children coming home to visit. On day one, they were fabulous, but they were stale by day two. That was easily fixed by warming them in the oven, but it made me wonder why homemade sweet rolls go stale. And I knew exactly who to ask that question.
Part Two: A new take on an old recipe
I was unsure if a soft Southern style of cinnamon roll was in his wheelhouse, but Andrew assured me dough is dough.
In advance of his first consultation, I emailed Andrew my mom’s recipe and some concerns like why do they go stale and questions such as what’s the best flour to use. It was thrilling to get clear-cut answers, plus I came away with two big takeaways:
First of all, if I wanted the rolls to last a few days, I could use part of the flour in something called a ‘’scald,’’ which helps retain moisture, the basis of milk bread. You gently heat the flour, sugar, and milk mixture to 160ºF, whisk in an egg, and add it to the rest of the flour, salt, and yeast then mix the dough. To be technical, it has to do with starches, gelling, and hydration, but resourceful home bread bakers around the world have been applying this process each time they instinctively added leftover starchy potatoes or a porridge of oats or rice to bread and noticed how it made the loaf softer and keep longer.
‘’Unfortunately, very thinly rolled doughs with sugar around the crumb are prone to drying out as the sugar pulls moisture from the dough, so it’s sort of inevitable,’’ Andrew says.
A scald or tangzhong helps keep the rolls soft and moist longer. Glutinous rice flour is his scald flour of choice for two reasons: it forms a smooth paste when combined with boiling liquid (wheat flour and other starches clump and end up lumpy), and it is high in amylopectin, the best starch for holding off staling. That recipe, and a detailed step by step, can be found over on Wordloaf. The recipe I share today uses wheat flour in the scald. (And at the end, I offer a version for traditionalists not quite ready to scald!)
Secondly, I learned to add a little flour to the filling.
‘’Flour helps lock the moisture into the filling, so that it is more solid after baking,’’ Andrew says. ‘’In filled pan loaves (like babka or cinnamon bread), it helps prevent gaps from forming, because the moisture doesn’t turn to steam and inflate the space between the layers.’’
I often melt the butter and pour it over the rolled out dough, dust it with sugar and cinnamon, and call it a day. Sometimes, I sprinkle on raisins or chopped pecans. The first recipe Andrew shared with me began with soft butter, spread over the dough like you are buttering toast. He then spoons over a filling mixture of brown sugar, cinnamon, and flour. That’s what is pictured above. He has since modified his method to use melted butter and mix all the filling together before scattering it over the dough. Suit yourself.
I preferred the taste and color of a mixture of half dark and half light brown sugar, but you can use all light or all dark. Lastly, Andrew says to spritz the filling with water. (Have a mister as well as a kitchen scale handy when making this recipe.) The spritz of water helps the filling stay in place, he says, and ‘’makes it more syrupy without pulling moisture from the dough itself.’’
Andrew upped the salt in my mother’s recipe, and he told me to use unsalted butter in both the dough and filling. My Fleishman’s yeast from the jar was fine although he prefers instant yeast.
Part Three: Baking the sweet rolls
Here’s where I tell the truth: I baked the rolls the first two times with the wrong type of rice flour in the scald. If you want to make the scald with rice flour, it needs to be sweet rice flour and glutinous. The third time, right after Andrew is pulling his hair out dealing with my back and forth questions, I noticed the note at the end of his recipe. I could use King Arthur all-purpose wheat flour in the scald. I didn’t need to run out to the Asian market and get the correct rice flour. I was already using KA AP in the dough itself, so why not keep the recipe to just one flour?
The third bake was fabulous! But, just as Andrew said, it’s a little tricky making a scald using wheat flour because it wants to lump up. Just like gravy making, you whisk flour (and sugar) into cold milk, and then gently heat. I was concerned that heating in a saucepan on top of the stove would be too hot, so I took Andrew’s advice and heated the mixture in a glass bowl in the microwave in 15-second increments. He said the scald needed to reach 160ºF, and when it was lingering in the 140s, I placed the heat-proof glass bowl in a skillet with about an inch of water over low heat and let the scald come to 160ºF in this gentle bain marie, stirring constantly.
I also added a little more warm milk to the dough when I mixed it, and Andrew and I went back and forth about this, too, but I noticed the dough made with this extra milk was more like that of my mother’s rolls and baked into soft, imperfectly shaped rolls you could pull apart with your fingers.
My mother baked sweet rolls in cake pans, whereas I’d been baking them on a sheet pan or 13 by 9-inch pan for ease. But you definitely want a 9-inch cake pan because it helps the rolls stay squished together. She and I baked them on the middle rack of the oven, but Andrew says with enriched doughs like this it’s best to bake on a lower than middle rack so the rolls don’t over brown before they are baked through. He prefers 325ºF versus 350ºF, which was my mother’s choice, for the same reason, letting the rolls cook through before they get too brown on top.
In the end, my husband was very happy I decided to reconstruct my mother’s cinnamon roll recipe. While he didn’t think anything was wrong with the recipe in the first place, he agreed to be a taste tester as long as there was cold milk in the fridge.
He and I both agreed that the rolls made with the scald were impressive. We also liked them lightly glazed. Both Andrew and I asked our Instagram followers to weigh in about icing on a cinnamon roll, and the comments were heated! My followers leaned toward icing. I think Andrew’s were more evenly divided.
What do you think? Icing on a sweet roll - yea or nay?
Andrew did assure me my mistakes will make me - and you - better bread bakers.
‘’It is good to go down wrong paths,’’ he adds.
It is also good to smell your mother’s cinnamon rolls baking just before Christmas. I think she would love the touch of cardamom in the filling. And she always loved oranges at Christmas—in stockings, in ambrosia, and now, in the sweet roll glaze.
- xo, Anne
THE RECIPE:
My Mother’s Cake Pan Cinnamon Rolls (New and improved!)
Many thanks to Andrew Janjigian, for this new version of my mother’s recipe. It makes 13 large sweet rolls, all crammed in one cake pan. If you want to bake two pans, double the recipe. To freeze sweet rolls, bake them first, let cool in the pan, then cover with heavy duty foil and freeze right in the pan. Reheat in a low oven - 300ºF - covered, straight from the freezer. To make a wreath like my mother did, double this recipe, making two ropes of filled dough. Twist them together, and secure the ends. Place carefully on a baking sheet and bake until browned, and about 195ºF to 200ºF internal temperature. Let cool, then glaze and decorate.
Makes 13 rolls
The scald:
67 grams (a generous 1/2 cup) King Arthur unbleached all-purpose flour
20 grams (1 1/2 tablespoons) granulated sugar
178 grams (about 3/4 cup) cold whole milk
67 grams (about 4 3/4 tablespoons) cold unsalted butter, cut into pieces
1 large egg
Rest of the dough:
268 grams (2 1/3 cups) King Arthur unbleached all-purpose flour
2 1/4 teaspoons salt
1 1/8 teaspoons (half a package) instant dry yeast
54 grams (about 1/4 cup) warm whole milk (no hotter than 125ºF)
Filling:
105 grams (2/3 cup packed) light or dark brown sugar or a mixture of both
26 grams (a shy 1/4 cup) all-purpose flour
2 teaspoons ground cinnamon
1/2 teaspoon ground cardamom
Pinch of salt
28 grams (2 tablespoons) soft unsalted butter
Egg wash, if desired:
1 egg beaten with 1/2 teaspoon water and a pinch of salt
Glaze, if desired:
1 cup sifted confectioners’ sugar
Pinch of salt
2 tablespoons orange juice, milk, or cream
Grated orange zest, if desired
For the scald, whisk together the flour, sugar, and cold milk in a small heat-proof glass bowl until combined. Place in the microwave on high and heat 15 seconds. Remove and whisk until smooth. Return to the microwave for two more 15-second increments, whisking until smooth. Take the temperature of the scald. It needs to reach 160ºF. If not, place it in a skillet with an inch of simmering water, and while stirring constantly, heat until the scald reaches 160ºF. It will be quite thick. Whisk vigorously to avoid lumping. Remove the bowl from the water, place the pieces of cold butter on top, drape with a kitchen towel, and place in a warm spot 45 minutes.
Whisk the now melted butter into the scald, and whisk in the egg. Measure the flour, salt, and yeast into a large stand mixer bowl. Add the scald mixture and the warm milk. Mix on low speed until combined, about 2 minutes. Increase the speed to medium-high and with a paddle or dough hook mix until the dough begins to leaves the side of the bowl, about 6 minutes. It will be sticky and webby but gets less sticky as it is mixed.
Turn the dough into a medium-large bowl. Cover with a kitchen towel, and let sit in a warm place until it has expanded to 1.5 times its original volume, about 90 minutes.
Using lightly moistened hands, punch down the dough, and cover the bowl tightly and place in the fridge about 2 hours or overnight. OR, continue shaping the rolls. While my mother used the overnight method, and Andrew says refrigerating dough makes it easier to handle, I found the dough very easy to roll out and shape without the refrigerator step. (If you do chill the dough, remove it from the fridge about 1 hour before proceeding.)
Brush the inside of a 9-inch round cake pan with soft butter and set aside. Stir together the brown sugar, flour, cinnamon, cardamom and salt in a small bowl and set aside.
Lightly flour the top of the dough, and transfer to a lightly floured counter. Press into an 8-inch square. Using a rolling pin, roll the dough into an 8- by 20-inch rectangle, flouring the dough as needed to prevent sticking. Turn the dough so the long edges are parallel to the edge of the counter. Brush away any excess flour. Spread the soft butter over the dough, leaving a 1/2-inch untopped border along the edge closest to you. Cover the butter with the brown sugar mixture. Mist the top with water, including the uncovered front seam, until the sugar mixture darkens.
Starting at the back long edge, roll the dough into a tight and even cylinder, and gently pinch the long seam closed. Using a sharp knife, trim 1/2 inch off each end, and stack the end trimming pieces together to form one roll, with the cut faces on the outside. Place this roll in the pan. Cut the long roll of dough in half crosswise, and cut each half into 6 even pieces, about 1 1/4 inches wide. Place the rolls in the pan spaced evenly apart. Cover loosely with a kitchen towel and let rise in a warm place until doubled in size and no gaps remain between the rolls, about 60 to 70 minutes.
Set an oven rack in a lower-middle position, and preheat the oven to 325ºF about 30 minutes in advance of baking. If desired, brush the tops of the rolls with the egg wash for a more golden appearance. (It’s not necessary if you are going to glaze the rolls.) Bake until the rolls are deeply golden brown, about 30 minutes. Transfer the pan to a cooling rack. Serve warm or at room temperature.
To glaze the rolls while still warm in the pan, whisk together the sugar, salt, and liquid of choice in a small bowl. Add a half teaspoon of grated orange zest, if desired. With a soup spoon, drizzle the glaze over the top of the rolls.
If you want to make the dough without the scald:
Heat a scant 1 cup milk and 5 tablespoons butter in a saucepan over low heat until the butter melts. Let it cool until 115 to 120ºF.
Meanwhile, place 2 3/4 cups of flour, the 1 1/2 tablespoons sugar (my mother used twice that amount), 2 1/4 teaspoons salt, and 1 1/8 teaspoons yeast in a large bowl of an electric mixer with paddle and combine on low. Pour in the milk mixture and blend on medium until well combined. Add 1 egg and beat on medium 4 to 5 minutes to develop the dough. Add more flour as needed, a tablespoon at a time, but don’t add too much as you want a sticky dough that after beating will begin to leave the sides of the bowl. Remove the paddle, cover the bowl with plastic wrap, and place in the fridge overnight.(My mom tucked the dough in the fridge overnight because it’s easier to work with the next.)
The next day, punch down the dough, and turn it onto a work surface. With floured fingers press the dough into a square and proceed with the recipe above.
Depends on your mood. Depends on the day. But orange and cardamom? Home run! Ohtani style.
Or you might cover the bottom of the baking pan with butter, brown sugar and pecans and flip them out while still hot.
Love seeing your Mom and that story is so sweet, and a great collab with Andrew.